HOW TO DEEP CLEAN MAKE-UP BRUSHES
Hi guys
Today I thought I would write a blog post about how I deep clean my makeup brushes. Seen as our make-up brushes work very hard, I thought it would be a good idea to thouroughly clean them. Cleaning them is important as our face harbours bacteria so when we applying foundation that bacteria is going onto the brush which we are then rubbing on our face!! Sounds pretty horrible saying it like that! So anyway, I like to clean my brushes at least once a week. It's one of those tasks I dread doing. I find it so boring and monotonous but, I know it has to be done.
I occasionally go longer without cleaning them but then it feels disgusting rubbing a dirty brush all over my face and I also feel as though you don't get the application you desire. Well so I think. I clean my brushes by using one of two products (sometimes I use both). The first product I use is Johnson's Baby Shampoo and the other is the Real Techniques Brushing Cleansing Gel. Both work extremely well and thoroughly deep clean my make-up brushes. Out of both I prefer to opt for the Baby Shampoo just because, it isn't scented therefore doesn't irritate my skin (it's the best way to clean them if you have sensitive skin).
Now onto to the cleaning process:
Step 1: Start off by taking all the brushes to the bathroom (or to your nearest sink). Place them on top of a towel on a work top or floor. I use a fresh towel as it's more hygienic.
Step 2: Run the water so it's luke warm. You may want it more towards the cold side. If you aren't sure what that means it's the temperature between hot and cold. Not boiling hot and not cold. It's just nice. (If the water is to hot the glue which is holding each bristles together can melt causing the brush to fall apart).
Step 3: Make sure the water isn't running down the metal part (barrel) of the brush as this can also ruin the bristles.
Step 3: Make sure the water isn't running down the metal part (barrel) of the brush as this can also ruin the bristles.
Step 4: Dampen the bristles (mainly the tip) then use a dash of either the Real Techniques Brush Cleansing Gel or the Johnsons Baby Shampoo. Clean your brush. (I squirt the shampoo into the underside of our soap dish just because it's easier to dip the brush into it)
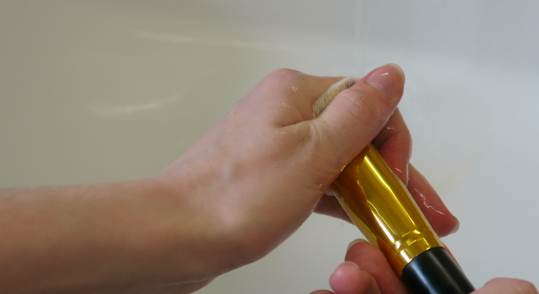
Step 5: Keep making circular motions on the back or palm of your hand to clean the brush. It's also very important to make sure every bit of shampoo or brush cleaner is out. So keep rinsing the bristles.
Step 6: Give the brush a gentle squeeze to make sure all the soap is gone.
Step 6: Give the brush a gentle squeeze to make sure all the soap is gone.
Step 7: After you have done this place the brush flat on a clean towel to dry.
When leaving them to try I place them facing alternative ways just because I feel it will help them to dry quicker.
I hope you enjoyed this blog and found it useful!
Kayleighx
https://youtu.be/isfy5BKqUbY
When leaving them to try I place them facing alternative ways just because I feel it will help them to dry quicker.
I hope you enjoyed this blog and found it useful!
Kayleighx
https://youtu.be/isfy5BKqUbY


Comments
Post a Comment